US
 Australia
 United Kingdom
 Europe
NOLATHANE Control Arm Assembly with Ball Joint
IMPROVE GRIP, HANDLING & PERFORMANCE.
A control arm and ball joint assembly arrives complete. The bushings are already in the arm, the ball joint is already installed, and the whole thing bolts into the factory mounting locations. For a repair that would otherwise involve a press, drilled out rivets or both, that changes the job considerably. Does a Control Arm Come With a Ball Join... Read more
A control arm and ball joint assembly arrives complete. The bushings are already in the arm, the ball joint is already installed, and the whole thing bolts into the factory mounting locations.
For a repair that would otherwise involve a press, drilled out rivets or both, that changes the job considerably.
Does a Control Arm Come With a Ball Joint
Not always, and it depends entirely on the listing rather than on any industry standard.
Bare arms are sold for applications where the ball joint bolts in separately, or where a shop is expected to transfer a serviceable joint across from the old arm. Complete assemblies arrive with the joint already fitted and no further work required. Plenty of catalogs list both for the same vehicle at different prices, which catches people out when they compare on price alone.
The listing states which you are buying, and it is worth reading before ordering rather than after the vehicle is apart. A control arm with ball joint and bushings included is a different part number to the same arm supplied bare.
On vehicles where the joint is not separately serviceable, the question answers itself, since the only version offered is the complete assembly. That covers a growing share of modern applications, because manufacturers have steadily moved away from designs the owner can take apart.
Why Control Arm Ball Joints Are Often Riveted In at the Factory
This is the reason assemblies exist in the volume they do, and it surprises people who have not done the job before.
A great many manufacturers rivet the ball joint into the control arm at the factory. Rivets are cheap, fast on a production line, and permanent, which is fine from the manufacturer's point of view because their intention was never that you would replace the joint on its own.
Replacing a riveted joint means drilling out three or four rivets, usually from underneath, on a component still attached to a vehicle that is on stands. The replacement joint then bolts in with supplied hardware, because there is no practical way to rivet it back. It is a legitimate repair and plenty of people do it, though it is slow, awkward and unforgiving if a drill wanders into the arm.
A control arm ball joint assembly removes the problem completely. The old arm comes off with the rivets still in it, the new one goes on with the joint already fitted, and no drilling happens at all.
The same logic applies to pressed-in joints, where the alternative is a hydraulic press and the risk of distorting the bore.
Loaded and Follower Joints on Upper and Lower Control Arms
Which assembly you need depends on where the joint sits and what it carries.
On most vehicles the spring sits on the lower control arm, which makes the lower ball joint the loaded joint. It carries vehicle weight continuously while also allowing the knuckle to steer, so it works harder and wears out first. A front lower control arm with ball joint is the most commonly replaced version for exactly that reason.
The upper joint on those designs mostly positions the top of the knuckle without carrying much vertical load. An upper control arm with ball joint is still a common repair, though it tends to fail from a split boot rather than from load.
Some trucks reverse this entirely, putting the spring or torsion bar on the upper arm. On those, the upper joint is the loaded one and the wear pattern flips with it.
If you are working out which corner to start with, the loaded joint is almost always the answer.
Control Arm Ball Joint Assembly or Bare Arm and Separate Joint
Where both are offered, the decision comes down to what you already have and how much risk you want in the job.
Buying a bare arm and a separate joint makes sense when the joint bolts in cleanly, when you have the tooling, and when the price difference is meaningful on your particular application. On a bolt-in design it is a straightforward assembly job on the bench, which is considerably easier than doing it under the vehicle.
Buying the complete assembly makes sense when the joint presses or rivets in, when you do not want the job to depend on a drill not wandering, or when the arm is coming off anyway and the time saved is worth more than the parts difference.
There is a third consideration that people tend to overlook. A ball joint with control arm supplied together has been assembled with the correct press fit and torque under controlled conditions, rather than in a driveway. On a safety critical joint that carries the hub, that is worth something.
If the price difference is small, the assembly is usually the better buy. If it is large, and the joint bolts in, the bare arm is perfectly sound practice.
Checking a Control Arm Assembly Before You Fit It
Worth two minutes before the vehicle goes in the air.
Confirm the side before anything else, because a driver side lower control arm with ball joint and its passenger side equivalent are frequently different parts and look similar enough in a box to be mixed up. Check the listing against the arm rather than assuming.
Check the ball joint boot is intact and seated properly, and that there is no sign of it having been disturbed in transit.
Confirm what hardware is included with it, since some assemblies ship with a new castle nut and cotter pin, others expect you to reuse or source them, and finding that out with the old arm already off is frustrating.
Compare the new arm against the old one once it is out, particularly the mounting point spacing and the ball joint stud taper. That catches a mis-listed part before it has been fitted rather than after.
Control Arm With Ball Joint Replacement Cost
Control arm with ball joint replacement cost is driven by labor, and the assembly usually works out favorably against the alternatives once you account for what each one involves.
Whichever route you take, the arm comes off the vehicle and an alignment goes on the end of the job. Both of those are fixed costs regardless of what you fit.
A rebuild adds whatever the joint itself requires. Drilling rivets takes time and carries the risk of damaging the arm. Pressing takes a hydraulic press and correct diameter tooling. Either can turn into a larger job if something does not come apart cleanly, and a shop quoting a rebuild has to price that uncertainty in.
An assembly removes the uncertainty, which is why the quoted difference between a complete arm and a rebuild is often smaller than the parts prices suggest.
If you are comparing quotes, ask whether the price assumes a riveted joint and what happens if a bolt seizes. Those two answers explain most of the variation.
Separating the Old Joint and Torquing the New Control Arm
Support the vehicle properly and take the spring load off before separating the old ball joint, because a joint under load releases suddenly and without warning.
Use a proper separator rather than a hammer. The knuckle bore and the stud threads are both easy to damage and expensive to put right.
Expect seized fasteners on any vehicle that has seen road salt, and allow time for them rather than being caught out.
Torque the inboard fasteners with the vehicle sitting on its wheels at ride height rather than hanging on a lift. A bushing settles into whatever position it is clamped in, so one tightened at full droop stays twisted at normal ride height and binds from the first mile.
Torque the ball joint castle nut to specification and fit a new cotter pin rather than reusing the old one. Never back a castle nut off to line up the hole, since tightening slightly further is the correct move.
Book the alignment for the same visit, because fitting the assembly changes camber and toe immediately.
Find Control Arm Assemblies for Your Vehicle
Need a different position? The full control arm kit selection lists upper and lower options.
Select your vehicle to see the suspension control arm and ball joint assembly options listed for it, in upper and lower positions where the design uses both. Every Nolathane component is backed by our warranty, a fitment guarantee and 60 day returns.
1 item
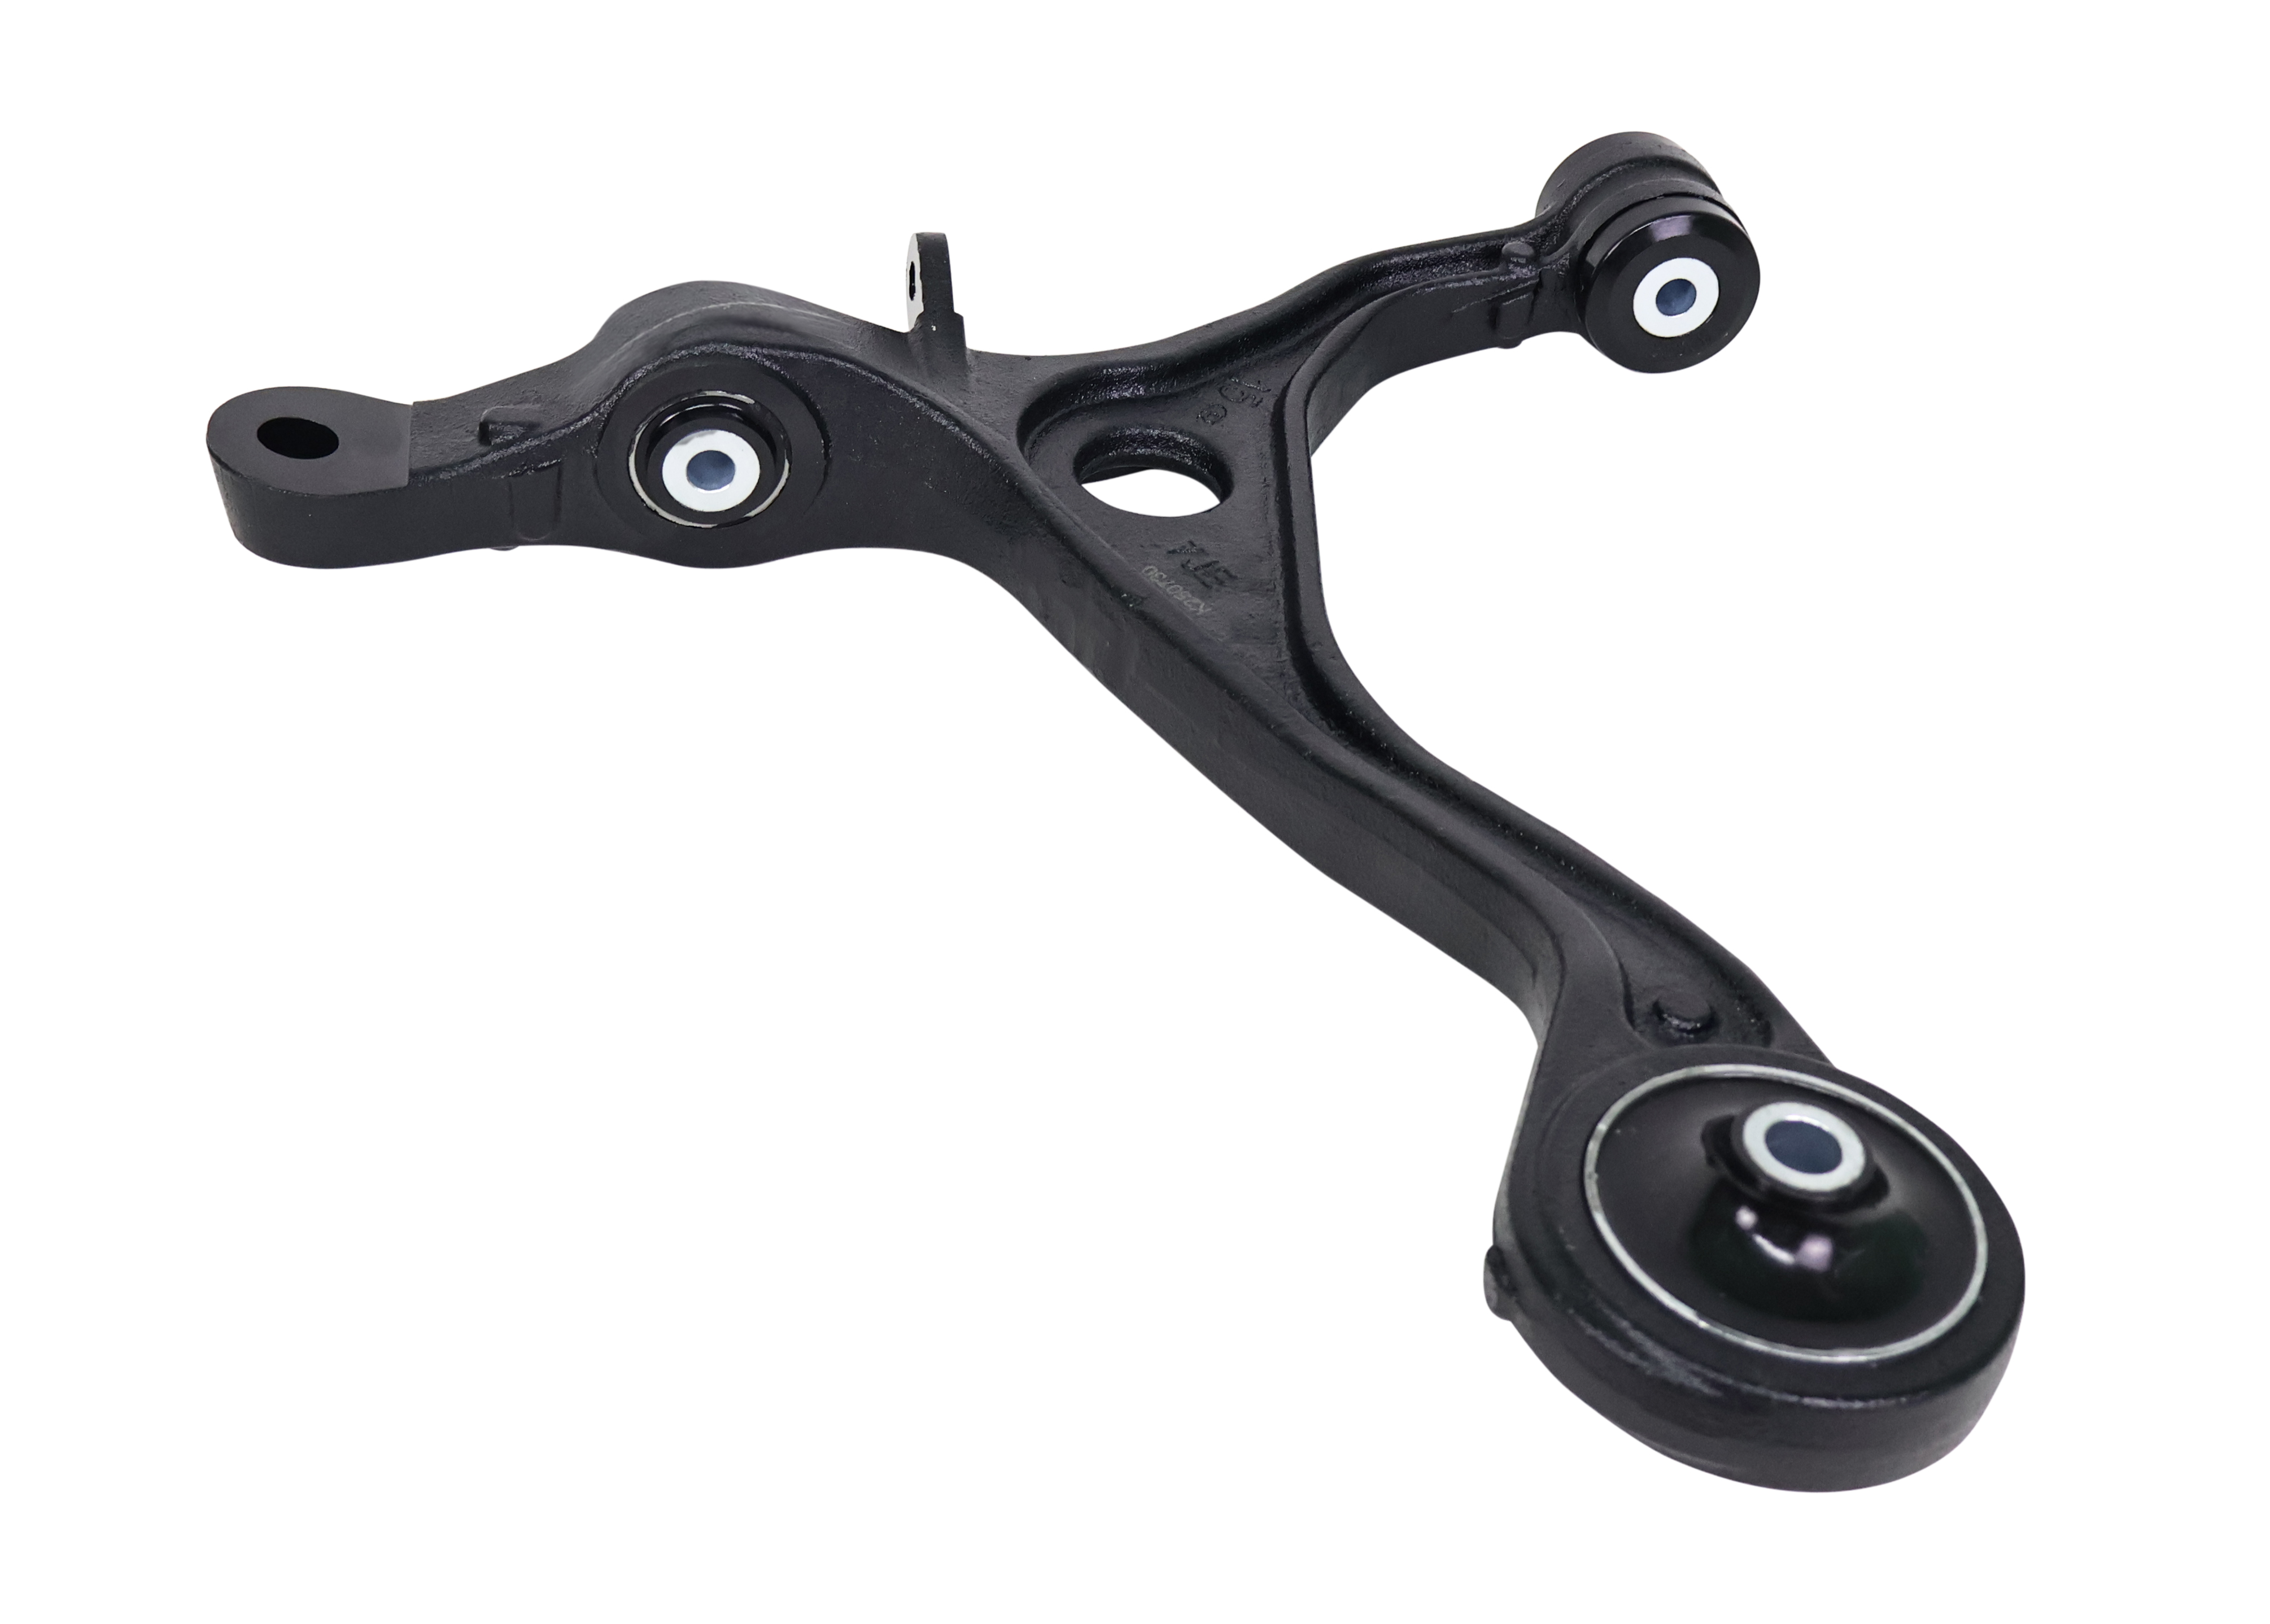 In StockShips within 24hrs.Ships within 24hrs.SKU: REV029.0258
Nolathane Front Lower Control Arm Replacement Right – Precision Fit and Handling Improvement for 2003-2007 Honda Accord
In StockShips within 24hrs.Ships within 24hrs.Qty Required 1$169.87
Your vehicle
Matching vehicles
No match — try selecting it below.
Refine your search
Clear all- Alignment Parts 2
- Camber Bolts 2
- Bushings 1877
- Alignment Pins and Bushings 7
- Axle Bushings 26
- Body Mount Bushings 89
- C-Bushings 6
- Coil Spring Insulators 14
- Coil Spring Spacers 29
- Control Arm Bushings 755
- Differential Bushings 47
- Fifth Wheel Bushing 1
- Lateral Arm Bushings 2
- Leaf Spring Bushings 41
- Leaf Spring Pads 5
- Leaf Spring Shackle Bushing 100
- Radiator Bushings 3
- Radius Arm Bushings 38
- Shock Bushings 33
- Steering Bushings 67
- Strut Mount Bushing 2
- Strut Rod Bushing 29
- Subframe Bushing 28
- Sway Bar Bushings 406
- Sway Bar Link Bushings 36
- Torsion Bar Bushing 2
- Track Bar Bushings 31
- Trailing Arm Bushing 71
- Transfer Case Bushings 4
- Trunnion Bushing 1
- Watts Link Bushing Kit 2
- Car Accessories 3
- Hood Bumper Stops 2
- Hood Latch Roller 1
- Control Arms 69
- Ball Joint 9
- Control Arm Kit 59
- Control Arm Assembly with Ball Joint 1
- Control Arm Kit - Lower 33
- Control Arm Kit - Upper 9
- Trailing Arm Kits 3
- Radius Arm 1
- Engine Bushings 54
- Engine Mount Bushings 54
- Exhaust Bushing 8
- Exhaust Mount Bushings 8
- Leveling Kits 6
- Nuts, Bolts & Screws 2
- Camber Bolt Kit 1
- Sway Bar & Sway Bar Kits 203
- Sway Bar Bracket 1
- Sway Bar Link 41
- Track Bar 2
- Transmission Parts 27
- Shifter Bushing 8
- Transmission Mount 19
- Universal Auto Parts 55
- Body Hardware 2
- Dust Covers 5
- Grease 1
- Rod End 7
- Spare Tire Carrier Mount 1
- Universal Bump Stops 38
- Winch Isolator 1
- Workshop Tools 3
- Bushing Press Kit 1
- Floor Jack Handle Clip 1
- Jack Holder Spring 1
No categories match.
Can’t find what you’re looking for?
Our team can help you find the right part — or tell us what was missing so we can improve the site.
Call Us +1 909-476-2860 Give Feedback (opens in a new tab)